Sunday, 18 November 2012

How to Change the Start Screen Background in Windows 8


Hello To All The Mindbenders,

Windows 8’s new Start screen has been hotly debated since the operating system launched in preview mode earlier this year. Acknowledged by some as a bold step into the tablet market, and criticized by many others who prefer the familiar desktop experience, the new 'Modern UI Style' home is here to stay. But beyond not offering a way to bypass this screen (not without the help of third-party utilities), surprisingly Microsoft is also limiting your options when it comes to customizing the Start screen's appearance. You can choose from a couple color schemes and 10 stock background images, but that's about it.

We've seen some workarounds before but they require firing up the HEX editor to modify system files, and you are still limited to 256-color background images in a handful of specific sizes. That’s more work than most people are probably willing to bother with and as you can imagine the results are not quite optimal.

Enter Decor8. Stardock’s latest Windows 8 customization app removes this limitation by giving users the ability to pick any picture they want, regardless of size or color range, as the Start screen background.


The program is pretty straightforward to use. Upon launching Decor8, you’ll be presented with a set of background images to choose from, including the start screen and desktop background images that Windows 8 ships with and also a set of wallpapers that Stardock ships with the app. You get the usual fill, fit, tile and center options available in the classic desktop, and the program will automatically create a color scheme to match each of your background images -- or you can manually customize the color scheme if you’re so inclined.

You can add folders to the program to use your own photos and images as background. There’s also the option to select multiple background images by holding down the Ctrl key, and have them rotate on a set time interval, as well as the option to fade background images against the start screen color for a subtle effect.

Sadly, Decor8 is not free. Stardock offers a free 30-day trial but otherwise asks a modest $4.99 for the app. It’s a little unnerving to pay for such basic functionality but if you wish to customize the Windows 8 Start screen beyond what Microsoft offers this is the easiest-to-use tool we’ve found. It does one thing and it does it well.


Opera Mini For Airtel Free Gprs Browsing


Hi To all,
The Mindbenders

I am Using Opera Mini From Last 2 years for free gprs but nowadays Airtel Is Strict About his Open Ports And Proxies...
So After Bearing a lot of tensions we have an opera mini browser for browsing internet, so that you can sms someone without paying or be in touch with your friends on facebook & gmail.

Working On Zero Balance...


K33p Yourself Updated With The Mindbenders...

Leave Your Comments Below If You Want To Ask Something...

Admin Page Finder For Pro


Hi To All The Mindbenders,
We Face Many Problems When There is a need of website admin page so as usual without wasting your time i have a smart and simple idea to find admin pages of most common website type like php, HTML, Java, etc. I Am Introducing a Perl Script For Finding Admin Pages.

Follow Me...

Step 1.
Download Active Perl 

Download For Linux

Download  For Windows

Step 2.
Download Admin Page Finder  from below link (Download)

Download

Step 3.
Using admin Page Finder In Linux (suppose you placed your admin finder scripts in root folder)
 Refer To The Gif Image Below
<1>
Initialize your admin finder

root@bt:~# perl Admin_Page_Finder_By_Devender_Mahto.pl

<2>
Type name of your site
Eg:- www.google.com

<3>
choose language in which site is designed and developed for example in my case its php

to choose just type 1 for php etc.

<4>
Keep loking for something like this 
[FOUND] www.yoursite.com/something.php 


Comments For Your Doubts...
And K33p Busting Your Victim's Like Pro...
39J0Y

KGB Archiver: Compress 1GB File to 10MB


Hello To All The Mindbenders,

KGB Archiver is free and open source software which compresses 1GB file to 10MB file.

Data compression utility of this software is based on PAQ6 algorithm which has AES-256 powerful encryption. KGB archiver works on both Windows and Linux operating system. Compression ratio of this software is very high. Due to high compression levels, time to compress a file goes high as the size of the file increases and compression ratio may vary depending on the format of the file.When a file is compressed with KGB Archiver it saves it with own extension and at the time of decompression it automatically recognizes the file format. The only limitation of KGB archiver is, decompressed file cannot be open or extract with other compression softwares. You can also choose any compression level (high, maximum, normal, low, very weak) to compress a file but the compression time  will vary according to your selected compression level.


Note: If you are compressing any file with KGB archiver and sending the comprssed file to your friends then he must have KBG archiver installed on his computer to decompress the file.

System Requirements:

Due to high compression ratio of KGB archiver, you need to have a decent system hardware configuration
  • 256 MB RAM
  • 1.5 GHz Processor

Features of KGB Archiver

  • Supports native .kgb files and .zip files
  • AES-256 Encryption
  • Able to create self-extracting archives.
  • Multilanguage supports like Arabic, German, Greek, Japanese, Spanish many more.
  • Unicode is supported in both User Interface and File Systems.
  • An Explorer shell extension is available for the windows version.
  • Make Password protected compressed file

    Click Here To Download KGB Archiver

Note
: This KBG Archiver software cannot compress video format files.


    Friday, 16 November 2012

    How to Get Rid of the Non-Essentials Features Of Your Gmail Account


    Good Morining Friends,
    I’ve been running a Minimalist Gmail setup lately, stripped of nearly everything but, you know, emails … and I’m in love with its simplicity.
    There’s something pure about having nothing but the essentials.
    Now, some of you will recall a couple of other posts I did, and let’s quickly review them for background:
    So, two things: one, I haven’t completely killed email. I still use Gmail, though not as often. I have moved most of my communication to Twitter, Google Docs, a wiki, and Basecamp. But I still do email, a little. It’s a hard thing to kill, but maybe drastically reduced email usage is OK with me. It’s certainly less stressful.
    Two, when I do use Gmail, lately, I am bothered by all the clutter. I removed all the gadgets, and still too much. Google is known for its simplicity, but I really wanted to strip out not only ads but chat and the navigation menus at the top and more. So I did.
    I’ve used Greasemonkey for Firefox and some great user scripts, listed below, to achieve this. I thought of rewriting Gmail’s CSS, but user scripts are much easier. It didn’t take long — just Googled every little thing I wanted to do, and found others had already solved the problems, one at a time.
    Here’s how I’ve made Gmail into a minimalist inbox:

    1. Fire and Grease. First, be sure you’re running Firefox withGreasemonkey installed. I love the minimalism of Google Chrome — been running both the dev version and latest Chromium builds — but unfortunately it can’t do what Greasemonkey can, at the moment. So I mostly just use Firefox for Gmail now.
    2. Remove gadgets. First thing I removed was gadgets — go to Settings, then Gadgets, and remove any you have installed. I had Twitter and Delicious. Then I went to Labs under Settings, and disabled “Multiple Inboxes” and the Google Docs and Google Calendar gadgets, as well as the option to move the Chat box to the right side of Gmail. Things were starting to get cleaned up!
    3. Hide labels, chat, footer. I really wanted to remove chat but couldn’t figure it out. Also, the clutter in Gmail’s footer was bothering me. So I found this brilliant user script: Gmail 3: Hide Labels, Chat and Footer. Install it in a click, and voila! Lovely.
    4. Remove ads. Ads on the right side of email messages also bothered me. Found a script to do this: Gmail Ad Remover. Added benefit of maximizing your screen space for messages.
    5. Remove stars. It’s a minor thing, but the stars are unnecessary for me. I don’t use them for task management (did at one time), so what’s the point?Gmail Remove Stars to the rescue.
    6. Gmail logo and searchbar. Found Gmail toggle searchbar area script. Cleans things up nicely. You can always toggle the search area back on if you need it, but most of the time when I’m processing email, responding, I don’t need this.
    7. Menu navigation bar. This was the most annoying. I couldn’t figure out how to remove the navigation menus that run across the top of Gmail. Then found the Gmail Real Estate script. It actually toggles not only the navigation menus, but the search area too. This somewhat duplicates the logo and searchbar script’s function above, but I’ve found they actually work nicely together, allowing you to show just a minimal navigation bar if you like, or whatever you feel like showing at the moment. I normally have everything minimized.
    Updated: 8. Clean up rows and remove the “inbox is empty” message!  
    Now two excellent Greasemonkey scripts. The first, called Gmail Clean Rows, removes the lines and other clutter from your inbox’s list of emails. The second is called Gmail Empty is Empty, and removed a small annoyance of mine — the message that shows up when your inbox is empty that says “No new mail! Want to read updates from your favorite sites? Try Google Reader”. Now the empty inbox is really empty, which is lovely lovely.
    Updated: 9. Remove extraneous buttons. I took it a step further, at my fans request, and wrote Gmail Inbox with Less Buttons, removing all the buttons above and below the inbox, except archive, report spam and delete. This is perfect, because I don’t have a need for the move-to, label or more actions drop-down buttons, or the refresh link, or the Select links below all the buttons. Your needs may vary.
    And that’s it. It might sound complicated, but basically it’s turning off some options in Gmail’s settings, and then installing a few user scripts. It should just take a few minutes. See the before and after pics below.
    How I Use Gmail, the Minimalist Way
    Now that everything is stripped down — no gadgets, no chat, no labels or stars — I just process and reply to email, and empty my inbox. Here’s how:
    1. Use keyboard shortcuts. See this list if you don’t already know them. Pressing a key such as “c” or “r” or “a” to do email messages, or “j” or “k” or “x” or “y” to navigate and select and archive, is much faster than using the mouse. I can process very quickly using shortcuts.
    2. Remove all unnecessary incoming email streams. Very important. Unsubscribe from all newsletters, all ads sent to you from businesses, all notifications from other services you use. Filter out messages from people who just forward jokes or chain mail. I no longer publish my email address, and give people other options for getting the info they want, so only my closest friends or business partners email me. Leaves the inbox relatively uncluttered.
    3. Process quickly. Just run through your inbox, processing like lightning. Each email requires instant action: archive or trash, reply then archive, put on your task list (see next item) and archive. Or just do the task now, and archive. Those are the only options. Should take 10 minutes tops.
    4. Tasks. I use a separate task list these days (Anxiety, a very simple Mac app) to make a quick note of any tasks, so that I can archive an email without needing it in the inbox as a reminder. Gmail Tasks is another good option — I don’t use it these days because I keep my email closed most of the time, and want my small task list open when I need it without having to open Gmail.
    5. Short messages. Keep things short, and it doesn’t take long to reply. I try to do it in 3-5 sentences. I rarely go over this.
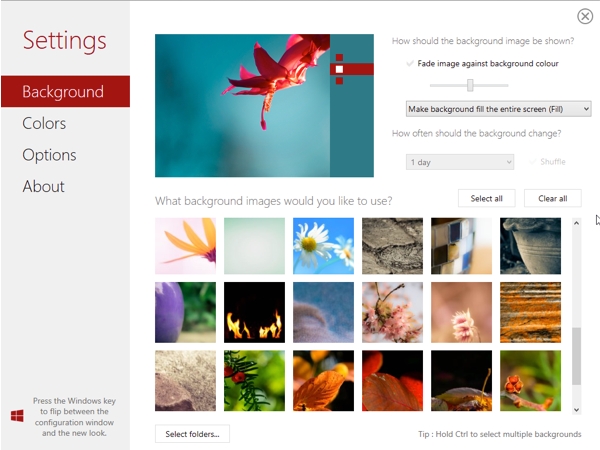
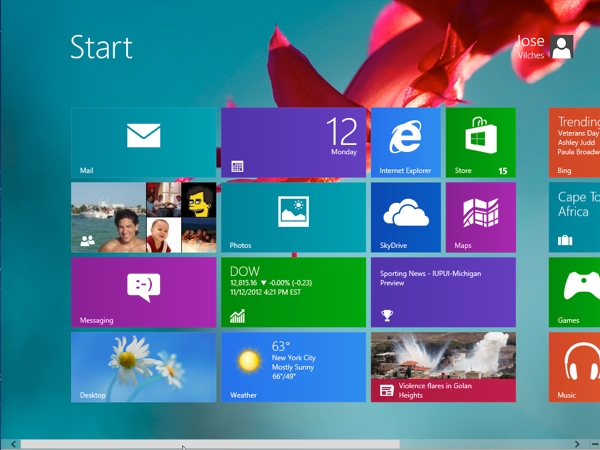
    Before and After Pics
    Took some screenshots to illustrate the changes. Click the thumbnails to see full images. Update: I’ve changed the “after” screenshot to illustrate the new scripts noted above by Matt Constantine.
    Edit: The Firefox theme you see in the screenshots is Chromifox Basic, modeled after Google Chrome. I didn’t mention this above, but I removed most of the toolbars and icons from Firefox awhile back, to make Firefox as minimalist as I can. You can do this in the View->Toolbars menu, unselecting toolbars and removing icons as you please.
    Before:(inlarge please)

    After: ( <> Maximize it)

    Comments and Queries are welcome for this Blog...The Mindbenders

    All Network Balance Transfer trick 2012


    H3ll0 FRi3nds...
    Today's Topic is Balance transfering From One Cell To Another in same network.
    Then Don't Wait For Anyone Go Ahead And Earn more knowledge to your Minds...

    1. Airtel Users Simply Dial *141# and follow the instruction

    2. TataDocomo users type a SMS as BT MobileNumber Amount and send it to 54321, e.g:- BT 9973548521 25 to transfer Rs.25.

    3. Idea users type a SMS as GIVE MobileNumber Amount and send it to 55567 | e.g:- GIVE 8092823031 30 to transfer Rs.30.

    4. Uninor Just dial *202*MobileNumber*Amount# e.g:-Dial *202*8271030185*20# to transfer Rs.20

    5. Vodafone Just Dial *131*Amount*MobileNo#, e.g:- *131*50*8086618302# for transfer Rs.50.

    6. Official Balance Transfer Trick For Aircel
    Now u can transfer the aircel Mobile Balance Officially DIAL*122*666# You can transfer 10, 20 and 100Rs

    7. Just Follow These Steps For Reliance Gsm Free Balance Transfer Trick :
    Step 1: Dial this number *367*3#
    Step 2: Then enter *312*3# and mobile(mdn) number
    Step 3: Enter the amount you want to transfer
    Step 4. Enter the pin. default pin is 1

    8. Bsnl balance transfer trick just send: (GIFT mobile noammout) to 53733 example: GIFT 9415646625 50 to 53733 note you can transfer balance to bsnl number only and you can’t transfer balance less than 10rs.

    Have Any Query Ask In Commemts
    KeEp ViSiTiNg DaIlY

    Boost Torrent Speed With Torrent Bitch Without Any Additional Customization


    Welcome Back,
    Now i Am Sharing a Torrent Client, No i didn't Developed this But Found useful For All Torrent Lovers... :D
    Then we are talking about a torrent client, and the name of that one is Torrent Bitch (Funny). Torrent bitch is a very light torrent client and as much powerful than your utorrent , Bitcomet & bittorrent. A Friend Of Me is Suggested To Use This App For Downloading Torrents. After Some days i used torrentbitch and its downloading speed increased by almost 31% and and he is able to download torrent files with a Poor Health...
    When You Resume your Torrent utorrent and other torrent clients(except this bitch) Check Your Earlier Downloaded Pieces And Consume Your Time... But Torrent bitch Starts His Work(Downloading) Your Torrent as You Click on Play...
    So Here is The Link To Download Torrent Bitch.


    Reply In Comments If You Found This Useful For Your Torrents...

    Thursday, 15 November 2012

    How to Change Windows XP Start Button


    Step 1 - Modify Explorer.exe File

    In order to make the changes, the file explorer.exe located at C:\Windows needs to be edited. Since explorer.exe is a binary file it requires a special editor. For purposes of this article I have used Resource Hacker. Resource HackerTM is a freeware utility to view, modify, rename, add, delete and extract resources in 32bit Windows executables and resource files (*.res). It incorporates an internal resource script compiler and decompiler and works on Microsoft Windows 95/98/ME, Windows NT, Windows 2000 and Windows XP operating systems.

    get this from h**p://delphi.icm.edu.pl/ftp/tools/ResHack.zip

    The first step is to make a backup copy of the file explorer.exe located at C:\Windows\explorer. Place it in a folder somewhere on your hard drive where it will be safe. Start Resource Hacker and open explorer.exe located at C:\Windows\explorer.exe.

    The category we are going to be using is "String Table". Expand it by clicking the plus sign then navigate down to and expand string 37 followed by highlighting 1033. If you are using the Classic Layout rather than the XP Layout, use number 38. The right hand pane will display the stringtable. We’re going to modify item 578, currently showing the word “start” just as it displays on the current Start button.

    There is no magic here. Just double click on the word “start” so that it’s highlighted, making sure the quotation marks are not part of the highlight. They need to remain in place, surrounding the new text that you’ll type. Go ahead and type your new entry. In my case I used       

                                                   end

    You’ll notice that after the new text string has been entered the Compile Script button that was grayed out is now active. I won’t get into what’s involved in compiling a script, but suffice it to say it’s going to make this exercise worthwhile. Click Compile Script and then save the altered file using the Save As command on the File Menu. Do not use the Save command – Make sure to use the Save As command and choose a name for the file. Save the newly named file to C:\Windows.


    Step 2 – Modify the Registry

    !!!make a backup of your registry before making changes!!!

    Now that the modified explorer.exe has been created it’s necessary to modify the registry so the file will be recognized when the user logs on to the system. If you don’t know how to access the registry I’m not sure this article is for you, but just in case it’s a temporary memory lapse, go to Start (soon to be something else) Run and type regedit in the Open field. Navigate to:

    HKEY_LOCAL_MACHINE\ SOFTWARE\ Microsoft\ Windows NT\ CurrentVersion\ Winlogon

    In the right panel, double click the "Shell" entry to open the Edit String dialog box. In Value data: line, enter the name that was used to save the modified explorer.exe file. Click OK.

    Close Registry Editor and either log off the system and log back in, or reboot the entire system if that’s your preference. If all went as planned you should see your new Start button with the revised text.


    Please Reply If Helps or Reply + Repute if Really Helps

    Create Your Own Authenticated Gateway And Command Your Network


    Use PF to keep unauthorized users off the network.

    Firewalling gateways have traditionally been used to block traffic from specific services or machines. Instead of watching IP addresses and port numbers, an authenticated gateway allows you to regulate traffic to or from machines based on a user's credentials. With an authenticated gateway, a user will have to log in and authenticate himself to the gateway in order to gain access to the protected network. This can be useful in many situations, such as restricting Internet access or restricting a wireless segment to be used only by authorized users.

    With the release of OpenBSD 3.1, you can implement this functionality through the use of PF and the authpf shell. Using authpf also provides an audit trail by logging usernames, originating IP addresses, and the time that they authenticated with the gateway, as well as when they logged off the network.

    To set up authentication with authpf, you'll first need to create an account on the gateway for each user. Specify /usr/sbin/authpf as the shell, and be sure to add authpf as a valid shell to /etc/shells. When a user logs in through SSH, authpf will obtain the user's name and IP address through the environment. After doing this, a template file containing NAT and filter rules is read in, and the username and IP address are applied to it. The resulting rules are then added to the running configuration. When the user logs out (i.e., types ^C), the rules that were created are unloaded from the current ruleset. For user-specific rule templates, authpf looks in /etc/authpf/users/$USER/authpf.rules. Global rule templates are stored in /etc/authpf/authpf.rules. Similarly, NAT entries are stored in authpf.nat, in either of these two directories. When a user-specific template is present for the user who has just authenticated, the template completely replaces the global rules, instead of just adding to them. When loading the templates, authpf will expand the $user_ip macro to the user's current IP address.

    For example:

    Code:
    pass in quick on wi0 proto { tcp, udp } from $user_ip to any \

      keep state flags S/SA

    This particular rule will pass in all traffic on the wireless interface from the newly authenticated user's IP address. This works particularly well with a default deny policy, where only the initial SSH connection to the gateway and DNS have been allowed from the authenticating IP address.

    You could be much more restrictive and allow only HTTP-, DNS-, and email-related traffic through the gateway:

    Code:
    pass in quick on wi0 proto tcp from $user_ip to any \

      port { smtp, www, https, pop3, pop3s, imap, imaps } \

      keep state flags S/SA

    pass in quick on wi0 proto udp from $user_ip to any port domain
    After the template files have been created, you must then provide an entry point into pf.conf for the rules that authpf will create for evaluation by PF. These entry points are added to your pf.conf with the various anchor keywords:

    Code:
    nat-anchor authpf

    rdr-anchor authpf

    binat-anchor authpf

    anchor authpf

    Note that each anchor point needs to be added to the section it applies to—you cannot just put them all at the end or beginning of your pf.conf. Thus the nat-anchor, rdr-anchor, and binat-anchor entries must go into the address translation section of the pf.conf. Likewise, the anchor entry, which applies only to filtering rules, should be added to the filtering section.

    When a user logs into the gateway, he should now be presented with a message like this:

    Code:
    Hello andrew, You are authenticated from host "192.168.0.61"

    The user will also see the contents of /etc/authpf/authpf.message if it exists and is readable.

    If you examine /var/log/daemon, you should also see log messages similar to these for when a user logs in and out:

    Code:
    Dec  3 22:36:31 zul authpf[15058]: allowing 192.168.0.61, \

      user andrew

    Dec  3 22:47:21 zul authpf[15058]: removed  192.168.0.61, \

      user andrew- duration 650 seconds

    Note that since it is present in /etc/shells, any user that has a local account is capable of changing his shell to authpf. If you want to ensure that the user cannot do this, you can create a file named after his username and put it in the /etc/authpf/banned directory. The contents of this file will be displayed when he logs into the gateway. On the other hand, you can also explicitly allow users by listing their usernames, one per line, in /etc/authpf/authpf.allow. However, any bans that have been specified in /etc/authpf/banned take precedence over entries in authpf.allow.

    Since authpf relies on the SSH session to determine when the rules pertaining to a particular user are to be unloaded, care should be taken in configuring your SSH daemon to time out connections. Timeouts should happen fairly quickly, to revoke access as soon as possible once a connection has gone stale. This also helps prevent connections to systems outside the gateway from being held open by those conducting ARP spoof attacks.

    You can set up OpenSSH to guard against this by adding these to lines to your sshd_config:

    Code:
    ClientAliveInterval 15

    ClientAliveCountMax 3

    This will ensure that the SSH daemon will send a request for a client response 15 seconds after it has received no data from the client. The ClientAliveCountMax option specifies that this can happen three times without a response before the client is disconnected. Thus, after a client has become unresponsive, it will be disconnected after 45 seconds. These keepalive packets are sent automatically by the SSH client software and don't require any intervention on the part of the user.

    Authpf is very powerful in its flexibility and integration with PF, OpenBSD's native firewalling system. It is easy to set up and has very little performance overhead, since it relies on SSH and the operating system to do authentication and manage sessions.


    And ? your done Tongue

    How Firefox Works Know Your Browser


    A Web browser is sort of like the tires on your car. You don't really give them much daily thought, but without them, you're not going anywhere. The second something goes wrong, you definitely notice.

    Chances are, you're reading this article on Internet Explorer. It's the browser that comes already installed on Windows operating systems; most people use Windows, and most Windows users don't give a second thought to which browser they're using. In fact, many people aren't aware that they have an option at all.

    Options are out there, however -- some people call them "alternative browsers," and one of them has been steadily chipping away at Internet Explorer's dominance. It's called Firefox. From its origins as an offshoot of the once popular Netscape browser, Firefox is building a growing legion of dedicated users who spread their enthusiasm by word of mouth (or blog).

    In this article, we'll find out what makes Firefox different, what it can do and what effect an open-source browser might have on the Internet landscape.

    Streamlined
    -----------
    Firefox is a relatively simple application without a lot of extra features and plugins included that many users won't need. This keeps the file size small, and it means that Firefox will run well even on older computers without using up a lot of system resources. Firefox proponents claim it's also more resistant to crashing.

    The easiest way to learn about Firefox is to go ahead and download it (it's free). You can find it at the official site:http://www.mozilla.org/products/firefox/. If you're hesitant to install and learn to use a new program, rest assured that Firefox looks and acts very similar to Internet Explorer and most other Web browsers. There's even a feature for IE users that lists the expressions you're familiar with and tells you the corresponding Firefox names for those functions.

    At the top of the screen, you'll find a bar for typing in Web addresses, a small search panel and a row of buttons -- the typical tools for common Web-surfing activities. Forward, back, home, reload and stop can all be found in this basic setup. These buttons, like just about everything else in Firefox, are fully customizable. You can rearrange them, get rid of some of them or add new ones.

    firefox toolbar

    Now, if Firefox is so similar to Internet Explorer, why bother switching? There are quite a few reasons, but the most important for many users is security.

    There is much debate over the security of Web browsers, stemming mainly from Internet Explorer's vulnerability as a common target for hackers and virus writers. Microsoft regularly releases patches and updates to fix security holes in Internet Explorer that might allow someone to install malicious software or steal information from a computer. Firefox has not been the focus of hackers so far, but that doesn't mean it's inherently safer. For now, Firefox is enjoying a reprieve from viruses and hackers primarily because, compared to the widespread use of Internet Explorer, it is relatively small-time. Hackers haven't bothered exploiting Firefox yet, because the low yield means it wouldn't be worth their efforts. If Firefox ever achieves dominance among Web browsers, that can be expected to change. See the Firefox Security section to learn more.

    Firefox Features and Extensions
    Firefox comes with a few useful features that set it apart from Internet Explorer 6 -- so useful, in fact, that Microsoft included a lot of them in Internet Explorer 7 (released in October 2006). One of the most noticeable is tabbed browsing. If you are browsing in Internet Explorer 6, and you want to visit a new Web site while keeping your current one open, you have to open a completely new browser window. Intensive Web surfing can result in browser windows cluttering up your taskbar and dragging on system resources. Firefox solves that by allowing sites to open in separate tabs within the same browser window. Instead of switching between browser windows, a user can change between two or more different sites by clicking on the tabs that appear just below the toolbar in Firefox.

    Firefox also has a built-in pop-up blocker. This prevents annoying ads from popping up in front of the browser window. You can configure it to let you know when pop-ups are blocked and to allow certain pop-ups from certain sites. This lets you enable pop-ups that are useful windows as opposed to unwanted ads.

    One feature of Firefox that is vital to some users is that it is a cross-platform application. That means that Firefox works under several different operating systems, not just Windows. For now, all versions of Windows from 98 and up are supported (as well as Windows 95, though it's a bit more difficult), along with Mac OS X and Linux.

    There's another notable Firefox feature that might be the coolest. It's like when someone asks you what you'd wish for if you could only have one wish, and you say, "I'd wish for unlimited wishes." Firefox extensions mean the browser has an almost unlimited number of features, with new ones being created every day. Still, the program remains fairly small, because users only add the extensions they want to use.

    extensions manager
    All of the extensions that have been added to Firefox show up in the Extensions Manager, which allows them to be configured or uninstalled easily.

    Junior high school students probably don't need stock market tickers, while people doing serious research don't necessarily need an MP3 player built into their browser. If there's a feature from another browser that you really like, chances are someone has made an extension so that it can be included in Firefox.

    Where do all these extensions come from? They're a product of Firefox's open source nature (see What does "open source" mean?). Not only is the code to Firefox available for examination and use, but Firefox provides developer tools for free to anyone who wants to create an extension.

    Msfupdate not working with "no version information available" error by Shubham Mittal (@k@ Upgoingstaar)


    A few days back while working with my testings and research, i came across an error which was continously depriving me of updating my metasploit framework. Error message was something like this :

    (Click on Image to Enlarge)

    No version available and blah blah blah. For that, i ignored it for a couple of days due to workload and downloaded exploits manually. But when it seemed kiddish to me, i got into roots. I soon realized that the "no version information available" error , here, meant that the library metasploit does not have a version to refer and hence it is not updating to any further version. Was quite kiddish, but realistic too. So i checked its libraries :

    (Click on Image to Enlarge)

    libssl.so.0.9.8 do not have a link to /usr/lib/ where as the entire library actually relies on the same. So what we need to do is : 
    Backup the library that is erroring msf.
    Create a link between the library msf and /usr/lib/

    Do this : 

    (Click on Image to Enlarge)

    Once you are done with all this stuff, go ahead and update your metasploit. You will get a smile on your face.

    (Click on Image to Enlarge)

    So this was how you dont need to put back your actions if you get any error anywhere, just like in case of msf. 

    Enjoy hacking, enjoy exploitation. :)

    Contact the CEO of a company with a social approach by Shubam Mittal (@k@ Upgoingstaar)

    Most of the time when you will send a mail to info@anycompany.com, believe me there are very less number of chances that you will get a good response. Reason being as simple as the number of bounces which you email will get until it reaches the right person. So why not send it directly to the targeted person.

    Making my words straighter, don’t you think writing this mail directly to the CEO of that company will do some good? 

    I was going through some chrome extensions and got something which can help this deed. Yeah, we can go ahead and get the EMAIL ID of a CEO directly without any co-operation from any Living Body.

    So for doing this, you have to count on me (only for about 5 minutes) and do what i say. 
    1.   Find out the Person: Go to the site of that company and find out whom you have to deal with, i.e. the person whose email id you will find out. If you are unlucky, you may not get anything. Don't loose hope. Go to Google and give some commands at its search bar. Within in a short span of time, you will hold the name of person whom you have to target. 
    2.  Use Rapportive: We will be using Rapportive extension for Reverse Engineering the work, so load your browser with this extension.
    3.  Integrate it with Gmail: Once you have installed Rapportive, open Gmail in a new tab and you will see a "rapportive" link coming on your screen.


    You can also integrate it with other your other Social Accounts.


    Reverse Engineer the Email IDs: Finally we have to check out some common combinations like firstname.L@company.com, firstname@company.com, firstname.lastname@company.com, firstname.LE@company.com, f.lastname@company.com. As you will try, you will get the following two responses:

    Example: Rapportive Profile Not Found


    Example: Rapportive Profile Found

    Once you have this, you had got their twitter and other accounts. But the story doesn’t ends up here. For these accounts, you also need to verify them. If it is a twitteraccount, check the number of their followers. If the profile seems to be active and connections are more than 400, then is must be fine. Reason why I am putting down emphasis on twitter; if you mention anything with @their_twitter_name, it will give a direct notification to them.

    Similarly for their LinkedIn account, if they have less than 500 connections that may raise points of issues for whether they use it properly or not? Moreover, whether they accept connections or not?

    Google Account can be checked similarly too with the working status of the profile. Sometimes, even phone number is found but don’t get greedy. Don’t make a call until you are a good Social Engineer.

    So, with this stuff, I will wish u Best of luck mates. I hope you are not going to mess up.